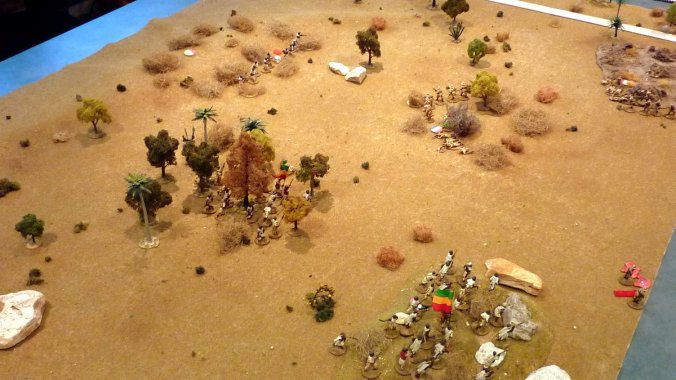
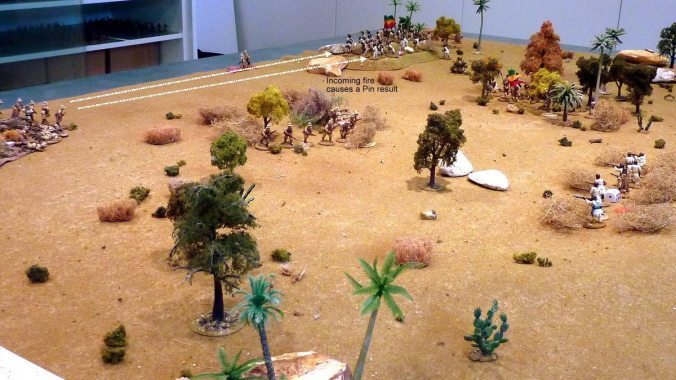
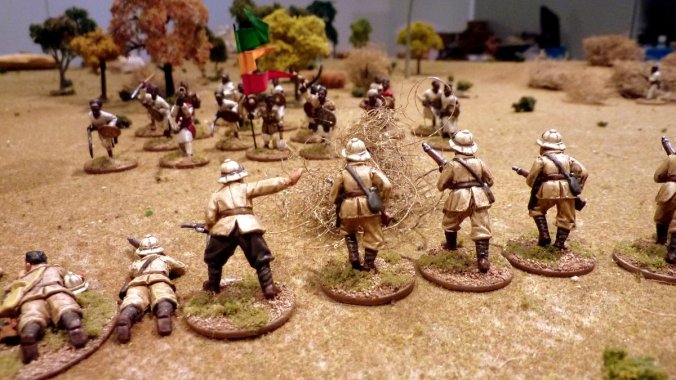
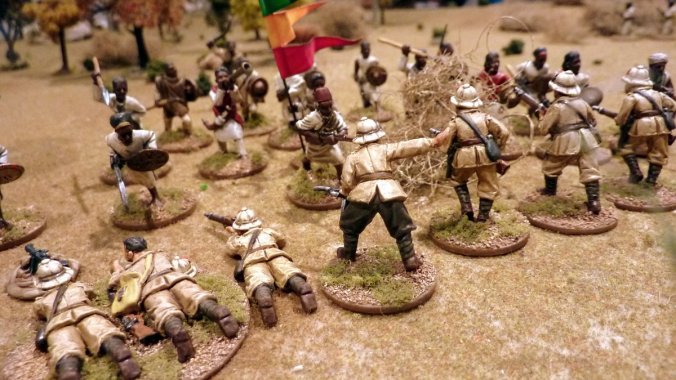
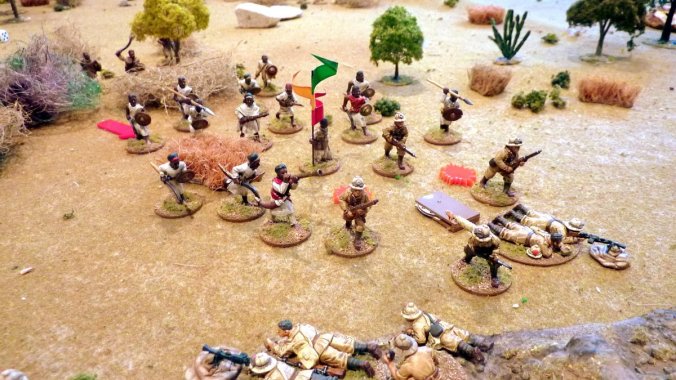
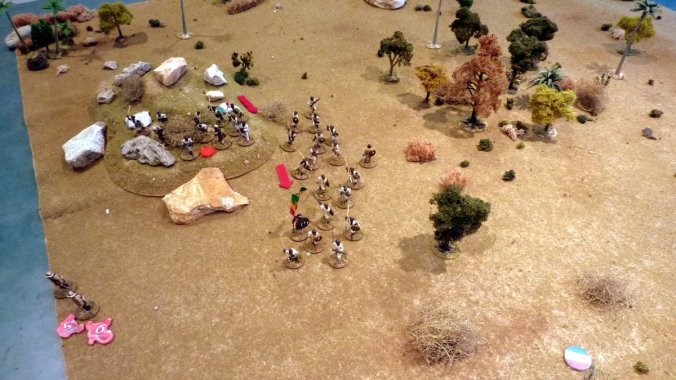
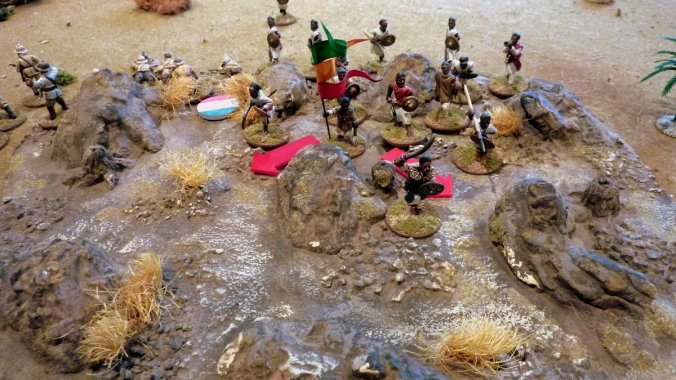
Ethiopian hazbs on the rocky ground , the Ammist Aleqa and his hazb in the wood with the chitet riflemen in the scrub to the left. The Italians occupy the central scrub area and rocky ground in the top-right corner.
Continuing on with the second and concluding part of the battle report and series of posts discussing the use of the Ethiopian irregular forces in Chain of Command: Abyssinia, the situation is as follows.
Seven phases have passed with no end of turn as yet. The Ethiopians having managed to pull of a coup de main by storming the rocky ground overlooking the main Italian position and stand poised with their (Ammist Aleqa) second in command and last leader positioned in the wood opposite the Italian position.
The Italians are hanging on grimly but are slowly taking a toll on the enemy before them. The Ethiopian player still has one more hazb to deploy just as the Italian player has his tripod mounted machine gun yet to arrive. The Italian player has two pips and the Ethiopian have three pips toward a Chain of Command dice. Italian force morale is 7 and the Ethiopian’s 5, with their commitment level set at Motivated.
…we continue the action…
φ
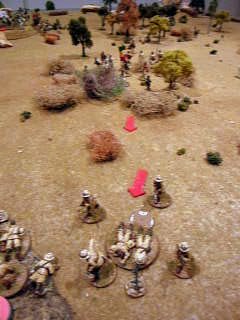
If you recall, this was the last image the Italian section two leader saw when looking through his binoculars…
.
.
.
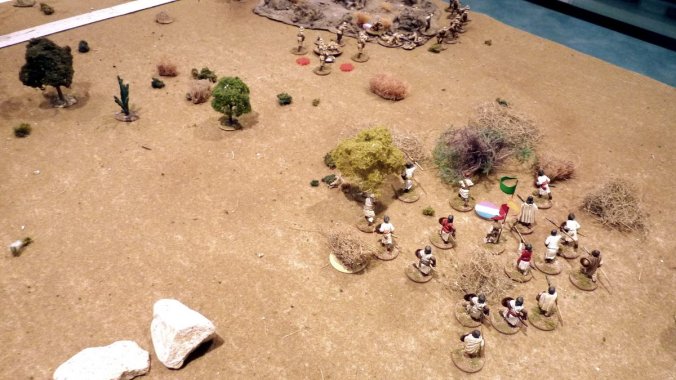
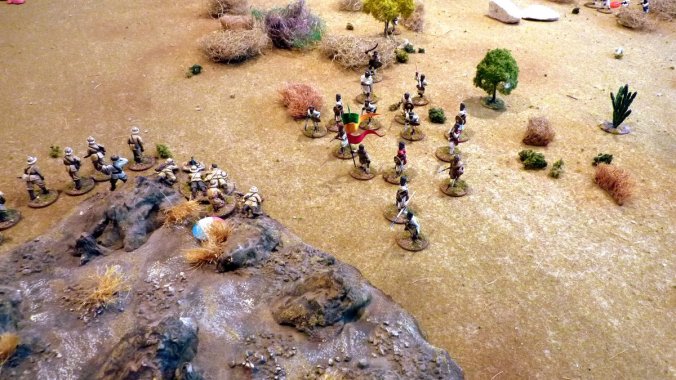
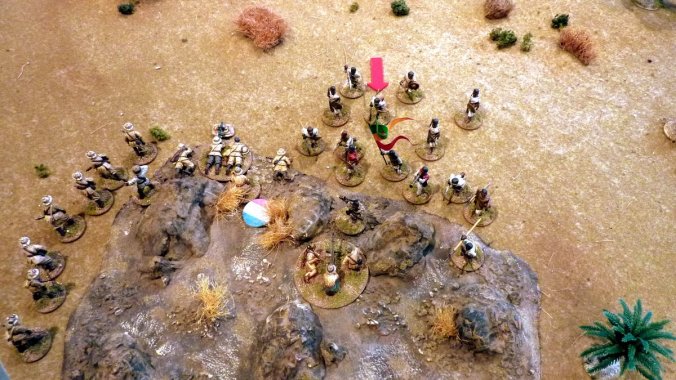
Here we see the situation as it stands with all the key players in view. The Italian player rolls his command dice, and for what is now the eighth phase not a single ‘1’ has been rolled for the introduction of the medium machine gun team….that’s Chain of Command for you! Whilst a junior leader could have been used to deploy the MMG the Italian player has chosen not to do so as he used his ‘3’ command dice to increase the fire of the AR team he was with – probably not a good choice.
On the left the Italian third section opens fire on the hazbs on the hill, the Flag proving a suitable aiming point for the section. The fire is effective causing two casualties and some shock, one being able to be ignored because of the Flag, but it still triggers a fire & combat effect test. Rolling for the hazb the Ethiopian player passes with no effect, aided by his still high motivation. Whilst it seems like these hazbs are invincible, they are taking casualties and unless they move off quickly and advance they are going to take a build up off losses that will reduce their size and hence ability to shake off the effects of fire and ultimately will become Pinned and then combat ineffective.
In the previous phase the third Ethiopian hazb with the Ammist Aleqa moved into position on the edge of the wood but took some incoming fire that caused a couple of casualties. They passed their fire effect test but the Italians are now just starting to assert some fire dominance on their opposition by forcing these checks and whittling them away.
Further to that the following Ethiopian command dice roll is of 1,5,5,6 and thus is largely unusable, though they build up their chain of command dice though not moving forward. The Italian player however rolls a fortuitous back to back score of double 6s and is also able to activate both leaders in each section.
They fire and rolling again straight away…fire!. The combined effect of two phases of fire is useful but still not effective enough…a missed opportunity. With all this firing the Italian player has still to roll a single ‘1’ on his command dice pool to bring on his MMG team! Also, as the team is off-table it’ll have to roll to arrive as the senior leader is on-table…perhaps the Italian defence wasn’t so well laid out after all!
.
.
.
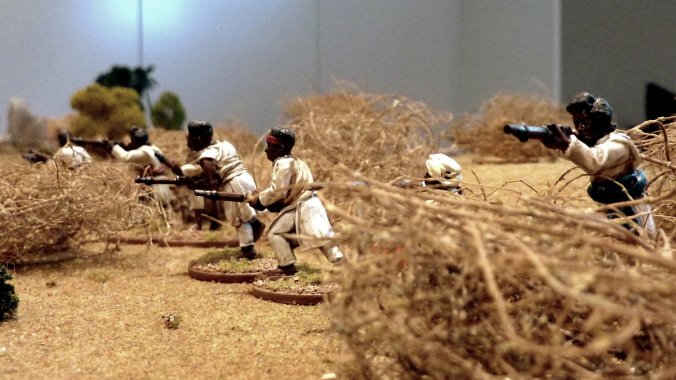
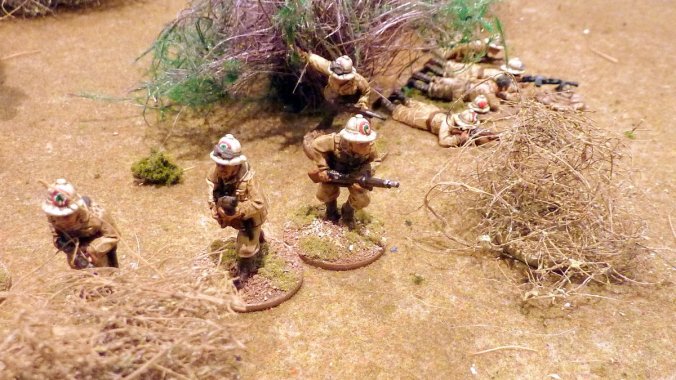
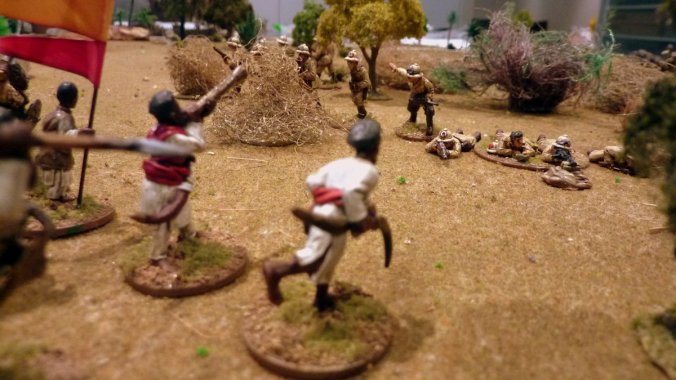
Chitet riflemen, still Pinned and doing little else except ‘being there’.
.
.
.
The following phase brings yet more inactivity from the Ethiopians but for the Italians they keep the fire pouring on. Section three fires on the hazb on the rocky ground and triggers a fire combat test. The hazb rolls a 1, adding +1drm because they are motivated, luckily raising there result to ‘Pinned’. If they hadn’t had their motivation modifier they would’ve routed! Section two fires at the nearest threat in the woods killing two chitet and causing a fire test which fortunately they pass.
So, with ineffective rifle fire from tribal riflemen, one hazb pinned and the other hazb leaderless with really only one in any position to close rapidly with the Italians the battle would appear to be swinging toward the Italian side. Also, for the small group of broken riflemen (from section one) they no longer have enemy that can easily close with them thereby giving them a temporary reprieve.
(Design note – even though no leader is with the pinned hazb they can still attempt to remove the pin if they are given a command dice to activate in a phase, as per the CoC-Irregular rules. However, as they have no leader they must abide by the result which could make such a test risky. In this case they have a +1 motivation modifier so it’s not possible for them to rout and they have reasonable chance of success to remove the pin. Nevertheless for the moment they are unable to do anything except try and remove that pin by unit activation and off course must continue to take enemy fire).
.
.
Section two squad leader instructs his men to keep up a hot fire and ready themselves for the next Ethiopian assault.
.
.
.
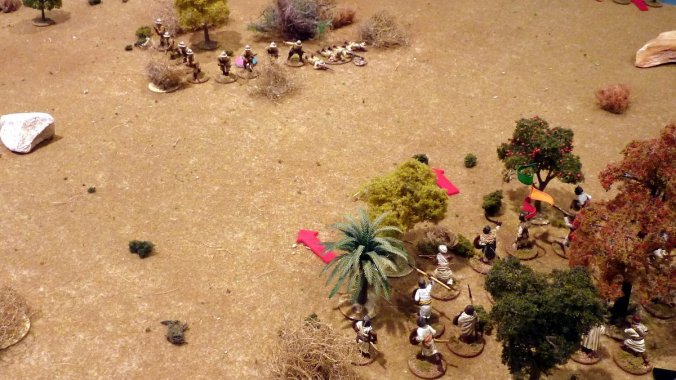
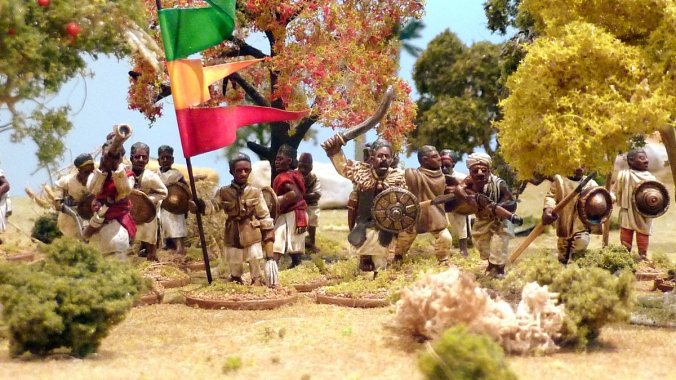
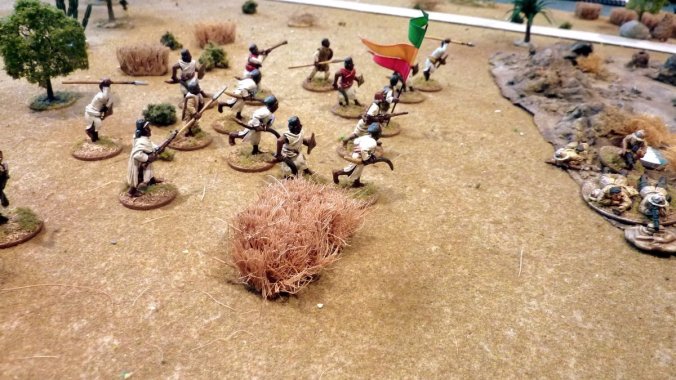
Realising that the momentum of the attack must be maintained the Ammist Aleqa orders an assault. Waving his sword “….attack…” he drives his men forward out of the wood and straight at the Italians in the scrub.
.
.
.

…Arrai!, Arrai!…
Unfortunately the move dice roll is insufficient to close within 4″ as they rolled a score causing them to fall short by just 1″…so no close combat!
.
.
.
Bracing themselves the Italians have a golden opportunity to deliver some devastating close range fire. The Italian player rolls his dice now hoping to be able to get some really effective fire going. He rolls his dice..6,4,5,5,5!! He gets three chain of command points but can only activate one senior leader…argghh! Whilst he gains a chain of command dice he has lost a chance to really put out some effective fire from section two… they are clearly rattled by the wave of Ethiopians heading their way.
.
.
.
“…when do we fire tenente…when?…”
.
.
.
In a moment frozen in time, the Italian leader loses his nerve and does not give the order to shoot.
.
.
.
.
.
.
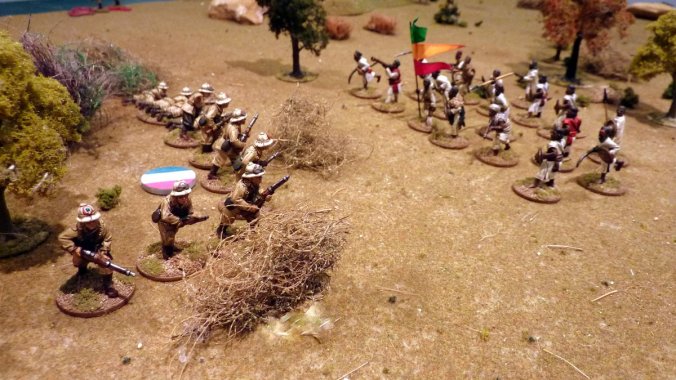
The Ethiopians now see their chance. The leader, sword in hand, waves his warriors on into the attack. As he is the only leader left to command he stays out of the combat and forgoes the chance to add extra combat dice but also prevents the chance he will be a casualty…always a high chance in close combat. He needs to bring up the other hazbs so watches on as his men surge into combat.
.
.
.
“…fight for your lives!…”
The Italians, now involuntarily open up and fight with rifle butt and bayonet on the enemy, giving them a total combat dice pool of 23 dice. The Ethiopians have a total of 24 combat dice…maybe the leader should’ve attacked after all? Dice are rolled and the Italians score two kills and six shock whilst the Ethiopians respond with a dice roll of six kills and one shock…butchery!
The Ethiopian shotel (sword) does its deadly work and the Italians lose the combat by ‘four dead’. This is enough to cause an immediate ‘rout’ result with double shock on the Italians….they run though remarkably the junior leader, whilst hit, is only knocked senseless for a phase and survives the attack.
This does however causes a test on the Bad Things Happen table and the Italian force morale drops by a further point but this also results in the Ethiopian motivation level to increase to the Highly Motivated state…they are now fully whipped up into a bloodlust.
.
.
.
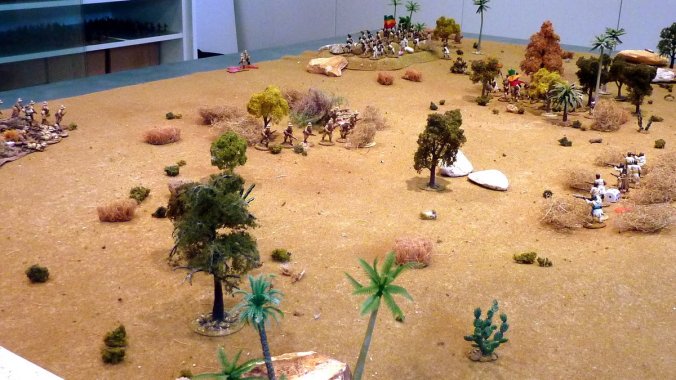
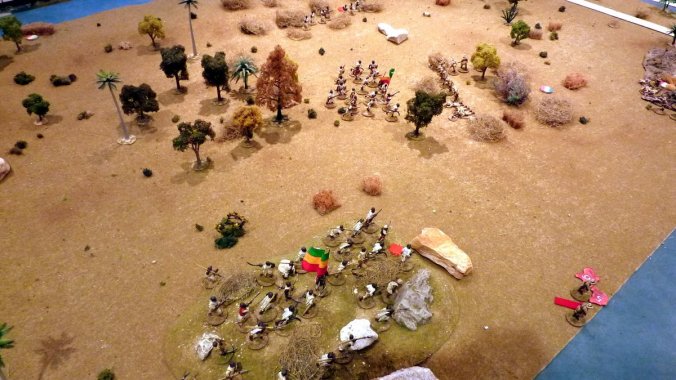
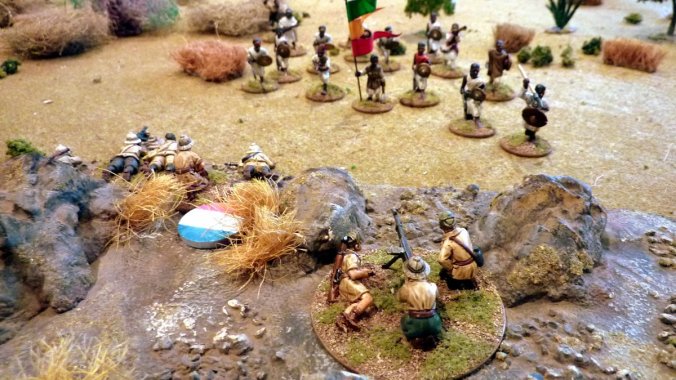
The Ethiopians, buoyed by their success overrun the Italian second section position and push through into the cover of the scrubby area now littered with the remains of the shattered Italian position. It’d been a bold and courageous assault that could easily have gone the other way but the chitet prevailed. In the blink of an eye things now look desperate for the Italians. With one bold and decisive charge the situation results in the following outcome.
The Italians have two units broken, the Ethiopians have captured two jump off points, they have built up five chain of command points so that if they can end the Turn with the play of a CoC dice they can force the Italians to check morale for th eloss of two JOPs and two broken units! That would all but see their force morale collapse and the battle end however it would result in the Ethiopian motivation level being returned to Committed, robbing them of the highly motivated state they are in at present….which is to their great advantage in helping pass motivation tests as they now gain a +2drm.
For the Italians, the last phase that robbed them of alot firing potential did however gift them a chain of command dice so they could counter the Ethiopian play of turn play, by using their chain of command dice by keeping the Turn going, though this also keeps the Ethiopian force motivation at its highest (and most dangerous) level….all pretty desperate stuff.
(Note – It’s worth point out that this decisive outcome in the Ethiopians favour could easily have gone the other way and the Ethiopians could have been forced to retreat with a broken unit, with another pinned and the Italians with two sections still in the fight and most likely a reduction in the Ethiopian force motivation level…so goes the fortunes of war!)
.
.
.
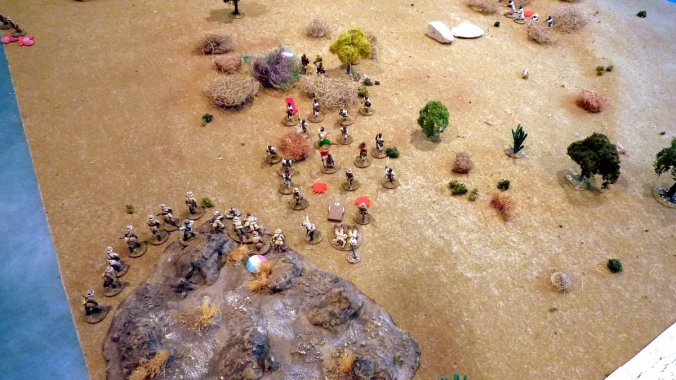
Ethiopians surge toward the last Italian position
.
.
.
“…run boys, run!…”
In the next phase the Italians, with the Ethiopians breathing down their neck, roll a 5,5,6,3,3. The dice allow a further build up of their second chain of command dice with the section three junior leader taking control of the Breda team to fire as much as possible.
Unfortunately the section rifle team is still facing off against the enemy to their front as the burst through by the Ethiopians is both immediate and unexpected, thereby not allowing them to reposition to bring their fire to bear. The Breda team open fire but to no effect. The routing men of section two are then engaged by the Ethiopians in their turn and, needless to say, are easily overrun and defeated in combat. This caused the a loss of a Junior leader who is killed outright and the section itself is wiped out.
The Ethiopians occupy the ground of the combat and are now almost within the section three position. The Italian player elects to use a chain of command dice to avoid a force morale check but the other still causes a force morale drop for the leader loss, it now being reduced to force morale four and as a result their command dice pool is now reduced from five to four dice…things look bad for the Italians….but they are hanging tough! The Ethiopians however have a force morale of 5 themselves so if they suffer a bad reverse then things could all come unstuck for them to!
.
.
.
“…push on!…”
.
.
.
“…don’t stop…attack!…”
.
.
.
In the next phase the Italians, with the Ethiopians before them roll a 5,1,4,3. The dice allow a further build up of the chain of command dice, now at 5 pips, but importantly the tripod machine gun (finally) successfully deploys and the whole section is able to fire, with the platoon senior leader taking control of the Breda team to fire as much as possible and the junior leader ordering long range fire with the rifle team.
The MMG and Breda open fire but they inflict only one kill and two shock though still causing a test on the fire combat table. Rolling a ‘2’ which is modified (+2drm) to a 4 (as the chitet are now in a highly motivated state), they pass the test…they will not be stopped! The Breda team open up but inflict a poultry two shock and causes no test…the Ethiopians surge forward…
.
.
.
In the next (Ethiopian) phase the the first hazb remains pinned and the second commences an advance. Note the Ethiopian player could attempt to lift the pinned marker of the first hazb but without a leader present this is risky as the rolled result must be obeyed. However they are highly motivated so there is a good chance they will pass or at least only remain pinned so giving them an activation dice in this situation would be a good idea…the Ethiopian player elected not to give them one this phase however!.
.
.
Meanwhile the Ethiopian player, his blood up, launches his devastatingly effective hazb in the final act.
.
.
.

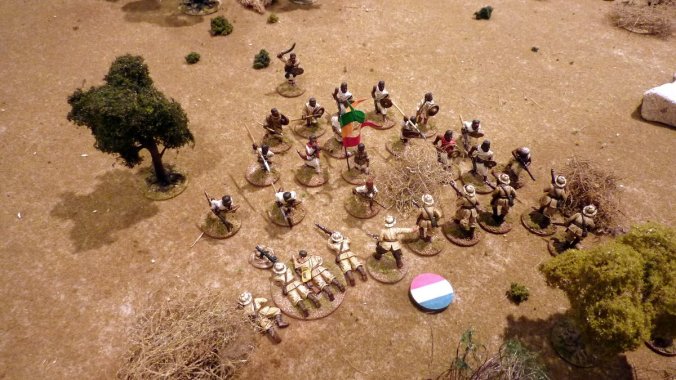
Straight at it, they throw themselves at the medium machine gun, overrunning it and in and behind into section three’s defensive position. The fighting is desperate but with their blood lust up the italians roll dismally in combat and the loss of the medium machine gun and a junior leader in section three causes the Italian morale to collapse to zero…the rest of the Italians break and run and is a decisive Ethiopian victory.
Final force morale is Ethiopians 5, Italians 0.
.
Italian combat dice…awful…
.
.
.
A clean sweep. The Italians are literally driven from the field everywhere!
.
.
.
“…Remember Adwa, remember Adwa!…”
.
.
.

.
.
.
COMMENTS
A victory and a complete one at that! The Italians in this engagement seemed to fail the test just at the times they needed things to go their way. In reality the game was much closer at a number of points than it perhaps seemed. They desperately needed to get that MMG into action and not deploy gin by th ruse of the junior leader was surely a mistake they paid for.
The opening encounter with the two Ethiopian hazbs able to emerge from and near the cave complex proved to be an excellent support list choice that helped them get a good start. This got their motivation level up and snipped off an enemy jump off points and gained them a potential force morale advantage when the end of turn came.
The emphasis on getting that motivation level up is critical and was clearly illustrated how a number of fire and combat tests were relatively easily passed when this occurred…motivation for irregulars is key!
Even though the game breaking combat against the Italian second section went in favour of the Ethiopians, in reality this was gamble. It was an even dice fight (23 vs 24 combat dice) and it is entirely possible the Italians could have held and then started to gain a proper fire ascendancy over the Ethiopians. The only riposte they had would’ve been their fairly weak tribal rifles unit which didn’t do alot in the end. So what looked like an easy Ethiopian win was in fact a fairly close run thing.
Even the force morale for the Ethiopians was a little touch and go. They only needed to lose two more force morale potions to be unable to win the scenario victory conditions so they did quite well to limit their loss to only 3 points, granted they stated the game with low force morale due to a poor die roll. As they only had two leaders this limited their potential for losing alot of force morale points which is a good thing anyway. It also means command and control suffers was well….so finding way to get around this by using the Flag was a smart support list choice.
.
So there you go, an emphatic Ethiopian victory with little more than sword and spear armed troops who made best use of their limited command ability and maximised their inherent advantages of speed, surprise spear and sword…


